|
|
Business
Issues - Marketing
Photographing
Lasers
Introduction
Laser shows are
a visual medium thus it is important to have good pictures
of the work you have done to show to clients and for advertising
and promotion purposes. Lasers are also more difficult
to capture on film and video than are traditional
subjects. This article gives some tips and techniques
for making better visual images of your laser show.
|
|
|
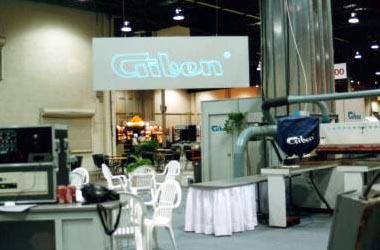
Photo of a laser
billboard at a trade show. This is a very difficult
situation in which to capture a good image of the laser
due to the very high ambient lighting conditions in the
venue. Photo
courtesy of Derek Garbos |
Film
Photography A traditional camera
and film is sometimes the best way to capture images of
lasers. This is particularly true if the image is to be
used for an enlargement or print applications as film has far
higher resolution than most digital cameras. Depending on if
you plan to use the photos as slides or prints, you must choose
an appropriate film. A high speed film such as 400 ASA is
best as higher speeds tend to become 'grainy' when enlarged
significantly.
You will need a tripod as large apertures and slow shutter
speeds are needed to capture the relatively faint light from the
laser - relatively faint when compared to thousands of watts of
room or stage lighting. If you have the opportunity to
"pose" the shots, you can adjust the ambient lighting
to 50% of normal so as to give a better contrast ratio with the
laser image or beam effect.
Logos are scanned many times per second so depending on your
shutter speed, you may only pick up a portion of the logo.
Logos are best shot in controlled conditions in your
studio. Use an 18% gray screen or a rear projection screen
to cut down on scattered light from a white surface which can
make the edges of the laser image fuzzy. Your best approach
is to use a shutter speed that will allow the scanners to 'draw'
the image onto the film several times while the shutter is
open. Speeds of 1/4 or 1/2 second work best but do not
hesitate to experiment.
You need to "bracket" your exposures, thus a camera
that allows for manual operation is the best for this
application. Bracketing is the process of taking the same
picture over and over but with different exposure
settings. For example, with the shutter speed set at 1/4
second, you would shoot an image at full aperture [usually f1.4
or f2.8 depending on the camera/lens combination], then the next
smaller aperture, then the next smaller, etc. Remember
that as the aperture gets smaller, the f number gets bigger -
f2.8 is a larger aperture then f4.5. In all, you should try 6 or
7 shots in order to find the optimum exposure.
Keeping track of the exposure can be problematical. One
solution is to have the laser projector display the shutter
speed and f-stop as part of the image. Shoot a test roll
bracketing your exposures generously and then take it to a
one-hour photo lab. When you get the results back, you will
see what exposures seem to be best for capturing the image and
you can now do the photo shot without the laser projecting the exposure
information. You will still need to bracket each shot to insure
the best results but you can now bracket in a narrower range to
conserve film. Capturing images of your laser at
shows can be much more challenging as you have little or no
control over ambient lighting [unless you can "pose"
the shot]. The best strategy is to shoot lots of pictures
and bracket each exposure as much as you can. Once you
have made some studio shots, you will have a good idea of the
range of exposures that works with your camera and film
combination. At live shows, you may want to use higher
shutter speeds such as 1/8 or 1/10 second to prevent any people
in the photos from becoming too blurred.
For the final photos, it is best to have your images processed
at a professional lab rather then a one-hour lab. This is
because the professionals labs charge a bit more but take extra
care with the processing work and you usually get better results
that at a one-hour lab. Professional labs generally have higher
standards for chemical purity and more tightly controlled
solution temperatures which can add to the quality of the
finished product.
If you are planning to use the photos for web pages, it is well
worth the small charge to have the lab put them onto a
Photo-CD. This is generally done directly from the
negatives or slides giving a better quality image than you can
obtain by scanning the prints. Digital
Photography
"Point and Shoot" type
digital
cameras do not usually offer the wide range of adjustments and
the possibility of bracketing exposures in the same way that
film cameras do. The newer DSLR cameras often do have a
full set of controls allowing for adjustment of many
parameters. A DSLR type camera usually also has a larger
sensor so the pictures have higher quality - even at the same
megapixels as a "pocket" type camera - due to less
digital noise in the image. Many of the same rules stated above such
as posing the shots or reducing ambient light apply to digital
photography.
Your best approach is to shoot as many pictures as possible in
the hopes that you capture a few good ones. Digital
photography is cheap and you can well afford to shoot 100 images
over the course of a show to get 6 to 10 that look great.
If your digital camera supports multiple image resolutions, try
shooting at both large and small picture sizes to see how the results
look. Often you will find that the lasers show up better
on the smaller size image as it is crated by sampling all of the
pixels in the camera's CCD and then averaging the results to
make a smaller sized image.
|
|
|
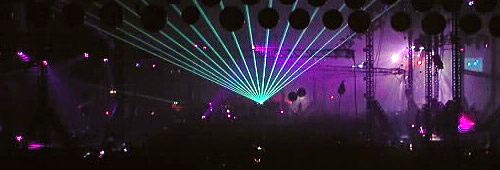
Photo of lasers at a
dance party. This image shows the lasers well as
they were in a somewhat dark space with lots of haze and
which was lit with a
contrasting colour. Photo
by L. Michael Roberts |
One aspect of digital cameras that is helpful is
good image processing software. The most popular program
is Adobe's Photo Shop. A good approach is to shoot as high
a resolution image as your camera allows, and then reduce the
image size in the processing software. Good image
processing software will sample the pixels and and 'add them
together' so that the beams appear brighter.
Image processing software also gave your the ability to adjust
brightness, contrast, colour balance and other parameters to
obtain the best results. Be wary of over processing the
the image as the end result can look fake.
Video
Producing a good video, especially if you are
targeting the corporate market, takes more than just setting up
a camcorder and pointing it in the general direction of the
laser show. The use of high quality professional cameras
can give far better results, not to mention that professional pacing,
titling and editing can add production value to your finished
demo tape. If you are marketing to corporate clients, have
your tape professionally produced to make the best impression.
You want to keep your demo tape short while still presenting a range
of your work. There is no hard and fast rule here however
under ten minutes is probably optimal. If you feel you have more
good material than can fit into ten minutes, then you might want
to consider making a longer video and then making a much shorter
edited version, You can then have the shorter edited version
at the beginning of the tape followed by the full length
version. That way, clients who would like to see more of
your work can view the longer version.
Lasers form a rapidly moving subject and due to the scanned
nature of many effects, "beats" between the laser and
the video system can occur giving the image on the tape a
flickering look that is not evident when viewing the original
laser image. This can be particularly troublesome with
logos or animations. This occurs because the laser is
drawing the image at say 20 frames per second, while the video
camera is capturing it at 25 or 30 FPS [deepening on the video
standard you use].
Fortunately, video is a real time medium so it is possible to
set up a monitor connected to the camera and look at the image
being captured. Often adjusting the frame rate of the
laser projector can help to ameliorate flicker in the taped
image.
Some of the more advanced video cameras offer low
light or shutter settings that can be helpful. Using these settings,
the image is sampled twice for each frame so that the results
are added together to increase light pick-up. You will
need to experiment with your camera to find the best results.
Logos and animations can be shot in the studio and then edited
into live footage as close ups so that they can be seen in the context
of the show. At the show, place the camera in a good
vantage point and avoid fast of sudden camera moves during the
show, or excessive zooming.
One final item is to have the finished master tape
"watermarked" with your logo. Watermarking is
the effect where a semi-transparent logo appears to be embossed
on the bottom right hand side of the picture. This serves
two purposes; it keeps your logo subtly in front of the client
while they are watching the video tape, and it prevents people
from stealing your material and claiming it as their own without
having to take measures to remove your watermark.
Once your master has been prepared, it is best to contract with
a professional duplication house to make copies. They can
provide very economical short tapes so you are not paying for a
lot of tape you don't use and they use professional equipment
such as Time Base Correctors to ensure the highest possible
quality copies. Don't forget to label the finished tapes
with a label including your logo, company name and address,
phone number, E-mail and web address [URL]. For the most
professional look, there should be a label on the top of the cassette
and on the spine.
DISCLAIMER:
Some of the information in the Backstage area is provided by the persons or
companies named on the relevant page(s). Laser F/X does NOT endorse or
recommend any products/services and is NOT responsible for the technical
accuracy of the information provided. We provide this information as a
service to laserists using the Backstage area.
[ Introduction
| Marketing |
Finances ]
|